JetRacer: Spurführung mit künstlicher Intelligenz und MATLAB/Simulink: Unterschied zwischen den Versionen
| Zeile 84: | Zeile 84: | ||
Verify that the CUDA Toolkit is installed on your device: <code> nvcc -V </code>. | Verify that the CUDA Toolkit is installed on your device: <code> nvcc -V </code>. | ||
Also add the code according this photo to change the PATH in the of .bashrc file. can edit using <code> nano ~\.bashrc</code> command. | Also add the code according this photo to change the PATH in the of .bashrc file. can edit using <code> nano ~\.bashrc</code> command. | ||
[[Datei:Imagepath.png|no]] | [[Datei:Imagepath.png|no]] | ||
Version vom 13. Januar 2024, 18:31 Uhr

Autor: Md Limon Apu
Art: Bachelorarbeit
Starttermin: 16.10.2023
Abgabetermin: 29.02.2024
Betreuer: Prof. Schneider
Einführung
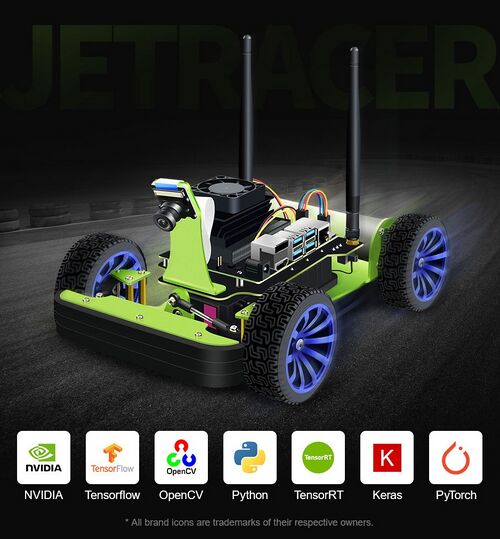
Der JetRacer ist ein Modellbaufahrzeug im Maßstaß 1:10. Der Hauptsensor ist eine Monovideokamera und die Datenverarbeitung erfolgt auf einem NVIDIA® Jetson Nano™.
Aufgabenstellung
- Einarbeitung in das bestehende Framwework und Dokumentation
- Nutzung von MATLAB®/Simulink zum Anlernen des Jetson Nano.
- Implementierung und Optimierung eines Reglers für die Spurführung (z. B. PD-Regler)
- Anlernen der KI für den Rundkurs im Labor Autonome Systeme
- Optimierung der Spurführung anhand der Parameter Fahrgeschwindigkeit und Präzision der Spurführung
- Bewertung der Vor- und Nachteile der Programmierungebungen
- Dokumentation nach wissenschaftlichem Stand im HSHL-Wiki
Project Plan

Worktime in the lab - Monday & Friday
Weekly Lab meeting - Monday
Research Results
Researching on the topic two most important part is Jetracer & Line following algorithm. And lots of research has been done on those regards topic and following are some notable references and which will be implemented on during this thesis duration.
- Jetracer is a AI based race car made by NVIDIA [1] for various project such as line following , the full configuration, connectivity and other material of the Jetracer can also be found in the official GitHub Jetracer page [2].
- For configuration and Connecting to the network following the link Jetracer: Teach-In Tutorial can be helpful to set up the full process.
- Describing the training process and experiments related to autonomous movement [3], this paper can give an clear outline for the full process. Also for object and design development [4] this paper give full insight with CNN and more technique.
- Line following following process is can be difficult in various way, for vision based technique shown in this paper [5] its also very challenging to achieve the goal. And for CNN based technique which also can be done [6] has been discussed in the paper.
- Lastly for motion control of the Jetracer which will be operate real time the system can be control & manage is achieve in this paper [7].
- Additional resources : For steering angle prediction [8], MATLAB deep learning model [9], Video classification in MATLAB [10].
- As a Result while doing the research both of the method(Computer vision and CNN) can be done extensively and mostly vision based technique will be used in this process.
Choose Environment
- For this thesis, MATLAB will be used as a main Application. It has several advantages while doing the process such as real time system [11], extensive MATLAB libraries and toolboxes, compatibility with Jetson nano hardware [12] .
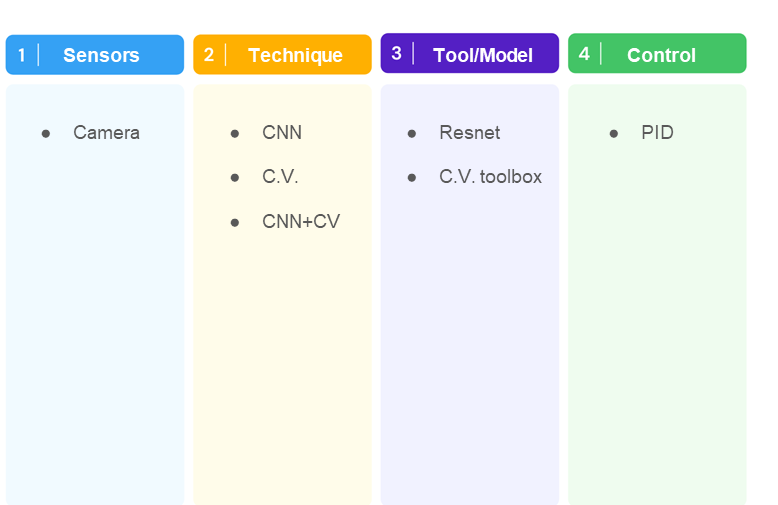
- To create a simple morphologic box (Zwicky box) for the project can be outline as this:
Hard- and Software Setup
- For the setup of Jetracer hardware it can be easily done following the manual [13], [[14]] and assemble it [15] .
- For Jetracer use the jetpack 4.6 [16] which is supported by MATLAB latest version.
- For Software setup firstly the Jetracer which has the Jetracer AI Kit on SD card to set it up and all the config. which the full process can be found in [17].
- MATLAB also is been installed on the local device to operate and manage the Jetracer. Then the addon package of nvidia-jetson is also installed for the hardware package. Various other package also been installed for this project such as Deep-learning, computer-vision, also gpu-computing.
Connection to the MATLAB & JETRACER
- USE Jetpack 4.6.1 and MATLAB version 2019b or 2020a.
- Connect JETRACER with a computer with HDMI, mouse, ethernet cable and keyboard.
- It will bring default Linux version and keep procced to setup. Keep
username = jetracer & password = jetsonduring setup. - After setup open the command window and give command
ifconfigto get the Ip address of Jetracer. - Connect the Ip to MATLAB using
obj = jetson(deviceaddress,username,password)in MATLAB. - Then it will give those command like in section below Herausforderungen.
- To fix those write in Linux terminal
sudo apt-get updatesudo apt-get install libsdl1.2-devit will install sdl1.2 version. - Open the terminal and copy this command :
  cd ~/Downloads
     # Install the CUDA repo metadata that you downloaded manually for L4T
       sudo dpkg -i cuda-repo-l4t-r19.2_6.0-42_armhf.deb
     # Download & install the actual CUDA Toolkit including the OpenGL toolkit from NVIDIA. (It only downloads around 15MB)
       sudo apt-get update
     # Install "cuda-toolkit-6-0" if you downloaded CUDA 6.0, or "cuda-toolkit-6-5" if you downloaded CUDA 6.5, etc.
       sudo apt-get install cuda-toolkit-6-5
     # Install the package full of CUDA samples (optional)
       sudo apt-get install cuda-samples-6-5
     # Add yourself to the "video" group to allow access to the GPU
       sudo usermod -a -G video $USER
then add :
    echo "# Add CUDA bin & library paths:" >> ~/.bashrc
    echo "export PATH=/usr/local/cuda/bin:$PATH" >> ~/.bashrc
    echo "export LD_LIBRARY_PATH=/usr/local/cuda/lib:$LD_LIBRARY_PATH" >> ~/.bashrc
    source ~/.bashrc
Verify that the CUDA Toolkit is installed on your device: nvcc -V .
Also add the code according this photo to change the PATH in the of .bashrc file. can edit using nano ~\.bashrc command.
Model development
- Firstly connecting to the Jetracer and MATLAB according to the [18] MATLAB documentation, which help up to setup the full process.
- For modeling the project it can be make as simple as possible to understand the steps to follow, in this paper [19],it shows some of the ideas and implementation can be done.
- A outline of the line following algorithm diagram can be:

- Firstly the camera configuration, Detecting the Jetracer camera then creating a video input object to set all the parameter like frame rate, resolution and others. Then the image acquisition can start its video labeling. [20]
- For image acquisition after setting up camera, it start capturing image on fixed parameter which has been set. Image Processing for the line following starts as a capture the lane data from track, then convert it to grayscale image. Also applying edge detection(Canny), thresholding to locate the line and process the data. Then it continues the loop for the full process.

- After getting all the data its time for analyze and make it setup for the Jetracer. While from the frame capture extracting the following line feature is main goal. Line positioning, direction of car, prediction of the path to follow next is also part of the process. All the analysis process the speed and steering control gets calculated to create a PID controller.
- Controlling the Jetracer with PID controller has various complex steps to follow such as maintaining the speed, line, steering angle. Setting up the PID values to minimum at first then after identifying the error rate of the predicted line. Then tuning the parameters of the PID help to get the control results.
- The structure of the model is divided in various part:
main.m: Contains the main loop and integrates other modules.
camera.m: Contains code for camera initialization.
processimage.m: Handles image processing & find line to follow.
PID_controller.m: Manages the PID control logic.
adjustSteering.m: Contains the code to adjust the Jetracer's steering.
Test & Results
- For testing the model we first need to establish connection between Jetracer & MATLAB.
Component Requirements
Hardware Requirements
Software Requirements
- Nvidia [Jetpack 4.6]
Software Einrichtung
| # | Quelle | Beschreibung | Dauer |
|---|---|---|---|
| 1 | Jetpack SDK 4.6.1 | Image herunterladen | 5 min |
| 2 | balenaEtcher | Image Writer herunterladen | 2 min |
| 3 | Image schreiben | Image mit balenaEtcher auf SD-Karte schreiben | 45 min |
| 4 | Image verifizieren | Dieser Punkt kann ggf. übersprungen werden. | 45 min |
Herausforderungen
Die Verbindung zur Hardware liefert:
obj = jetson('192.168.1.52', 'jetson', 'jetson'); % JETRACER2
Checking for CUDA availability on the Target...
Checking for 'nvcc' in the target system path...
Warning: Unable to find 'nvcc' on the system path. Update the '.bashrc' script on the target to set up the required environment
variables.
> In nvidiaboard/checkForNvcc
  In nvidiaboard/checkAndGetHardwareConfig
  In jetson (line 219)
  In test (line 3)
Checking for cuDNN library availability on the Target...
Checking for TensorRT library availability on the Target...
Checking for prerequisite libraries is complete.
Gathering hardware details...
Checking for third-party library availability on the Target...
Warning: Unable to find the SDL 1.2 library development tools on the target.
> In nvidiaboard/checkForSdlLibs
  In nvidiaboard/checkAndGetHardwareConfig
  In jetson (line 219)
  In test (line 3)
First time use setup ...
Installing v4l-utils ...
Gathering hardware details is complete.
 Board name         : NVIDIA Jetson TX1
 CUDA Version       :
 cuDNN Version      : 8.2
 TensorRT Version   : 8.2
 GStreamer Version  : 1.14.5
 V4L2 Version       : 1.14.2-1
 SDL Version        :
 Available Webcams  :
 Available GPUs     :
Next Steps: Contact MATLAB, Nvidia and Waveshare to solve these Problems.
Tutorials
- Get started jetson nano devkit
- Jetson Nano Developer Kit User Guide
- GitHub: JetRacer Projekt
- GitHub: JetBot Projekt
Anforderungen
Das Projekt erfordert Vorwissen in den nachfolgenden Themengebieten. Sollten Sie die Anforderungen nicht erfüllen müssen Sie sich diese Kenntnisse anhand im Rahmen der Arbeit anhand von Literatur/Online-Kursen selbst aneignen.
- Erfahrungen mit Künstlicher Intelligenz/Deep Learning
- Programmierung in MATLAB®, C++, Python
- Dokumentenversionierung mit SVN
Anforderungen an die wissenschaftliche Arbeit
- Wissenschaftliche Vorgehensweise (Projektplan, etc.), nützlicher Artikel: Gantt Diagramm erstellen
- Wöchentlicher Fortschrittsberichte (informativ), aktualisieren Sie das Besprechungsprotokoll - Live Gespräch mit Prof. Schneider
- Projektvorstellung im Wiki
- Tägliche Sicherung der Arbeitsergebnisse in SVN
- Tägliche Dokumentation der geleisteten Arbeitsstunden
- Studentische Arbeiten bei Prof. Schneider
- Anforderungen an eine wissenschaftlich Arbeit
SVN-Repositorium
Getting started
Lesen Sie zum Einstieg diese Artikel
- Siddiquy, T.: Automated lane following of a Waveshare JetRacer with artificial intelligence. Bachelorarbeit
- Kamal, A.: JetRacer: Optimierung der Streckenführung. Projektarbeit
- Gantt Diagramm erstellen
- Tipps zum Schreiben eines Wiki-Artikels
- PAP Designer Einstieg
- Einführung in SVN
Mögliche Folgethemen
- Kreuzungserkennung
- Vorfahrterkennung
- Hinderniserkennung und Umfahrung
- Schildererkennung
Nützliche Artikel
→ zurück zum Hauptartikel: Studentische Arbeiten

