RPLidar with ROS2 and RVIZ: Unterschied zwischen den Versionen
Zur Navigation springen
Zur Suche springen
Keine Bearbeitungszusammenfassung |
Keine Bearbeitungszusammenfassung |
||
| Zeile 34: | Zeile 34: | ||
rviz2 ./install/rplidar_ros/share/rplidar_ros/rviz/rplidar.rviz | rviz2 ./install/rplidar_ros/share/rplidar_ros/rviz/rplidar.rviz | ||
<br> | |||
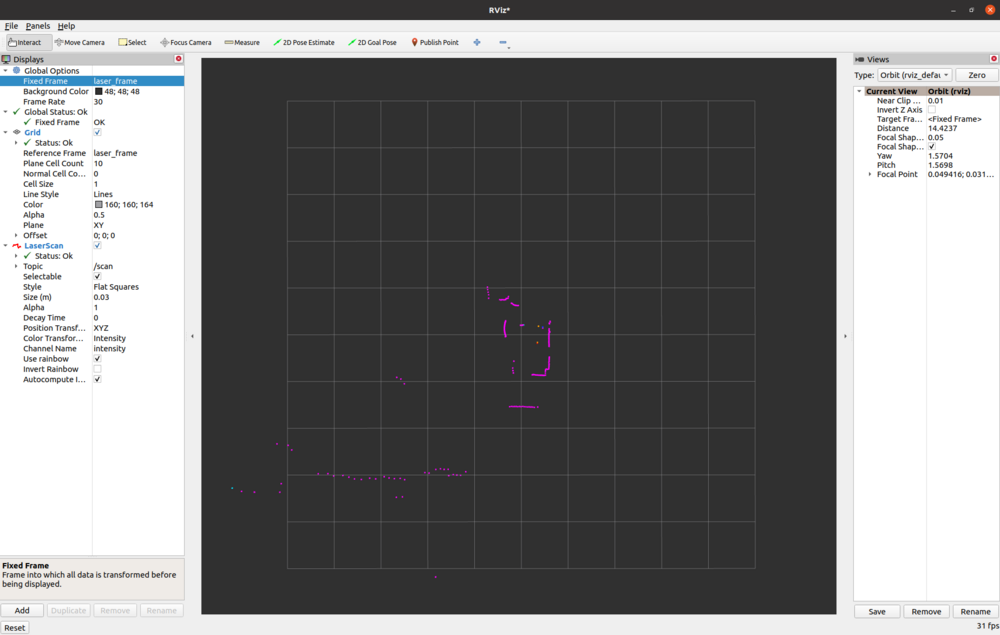
Then set frame into laser_frame | Then set frame into laser_frame | ||
After that, add laser scan and and select scan under Topic.<br> | After that, add laser scan and and select scan under Topic.<br> | ||
| Zeile 39: | Zeile 40: | ||
[[Datei:RViz Screen.png|thumb|links|mini|1000px|RViz Screen]] | [[Datei:RViz Screen.png|thumb|links|mini|1000px|RViz Screen]] | ||
<br clear=all> | <br clear=all> | ||
<br> | |||
Hurray now you can see the lidar scan in the RVIZ | |||
Version vom 27. Oktober 2022, 12:29 Uhr
This tutotrial shows how to connect a RPLidar to ROS2 and show in RVIZ.
Connect RPLidar to the USB port and follw the steps to shown below
Note: Here we are using RPLidar A1
open your terminal and clone the github project to your colcon workspace src folder
git clone https://github.com/CreedyNZ/rplidar_ros2.git
Then source the bash
source install/setup.bash
After that,
colcon build --symlink-install
Then run rplidar ros package
source ./install/setup.bash
ros2 run rplidar_ros rplidarNode
open a new terminal
source ./install/setup.bash
ros2 run tf2_ros static_transform_publisher 0 0 0 0 0 0 world laser_frame
Then, open a new terminal
source ./install/setup.bash
rviz2 ./install/rplidar_ros/share/rplidar_ros/rviz/rplidar.rviz
Then set frame into laser_frame
After that, add laser scan and and select scan under Topic.

Hurray now you can see the lidar scan in the RVIZ