JetRacer Inbetriebnahme: Unterschied zwischen den Versionen
Zur Navigation springen
Zur Suche springen
| Zeile 124: | Zeile 124: | ||
sudo nano /etc/hosts | sudo nano /etc/hosts | ||
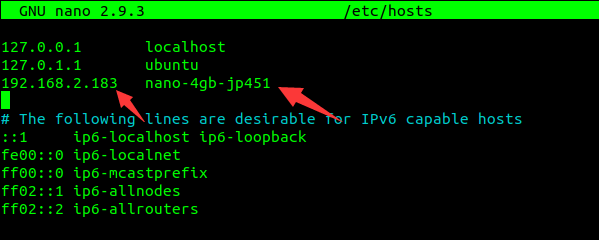
:*As shown in the figure below, modify the line below 127.0.1.1 nano-4gb-jp451.localdimain nano-4gb-jp451 to the IP address and hostname of the Ubuntu virtual machine 【if this line is commented out, you need to uncomment.】 | :*As shown in the figure below, modify the line below 127.0.1.1 nano-4gb-jp451.localdimain nano-4gb-jp451 to the IP address and hostname of the Ubuntu virtual machine 【if this line is commented out, you need to uncomment.】 | ||
:[] | :[[Datei:Jetracer_Kommunikation_Verbindung_Host_Step01.png|Step01]] | ||
:*After changing, press Ctrl + x, exit by y, enter, and save it to exit. | :*After changing, press Ctrl + x, exit by y, enter, and save it to exit. | ||
:''Virtuelle Maschine'' | :''Virtuelle Maschine'' | ||
| Zeile 130: | Zeile 130: | ||
sudo nano /etc/hosts | sudo nano /etc/hosts | ||
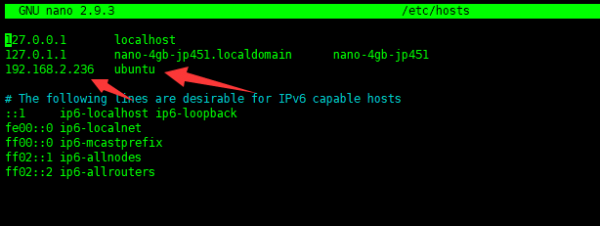
:*As shown in the figure below, change the line below 127.0.1.1 ubuntu to the IP and hostname of jetson nano. If this line is commented out, it needs to be uncommented. | :*As shown in the figure below, change the line below 127.0.1.1 ubuntu to the IP and hostname of jetson nano. If this line is commented out, it needs to be uncommented. | ||
:[] | :[[Datei:Jetracer_Kommunikation_Verbindung_Host_Step02.png|Step02]] | ||
:*After modification, press Ctrl+x, exit y, press Enter, save changes, and exit. | :*After modification, press Ctrl+x, exit y, press Enter, save changes, and exit. | ||
:'''Kommunikation überprüfen''' | :'''Kommunikation überprüfen''' | ||
Version vom 5. Februar 2025, 20:18 Uhr
Inbetriebnahme
- Jetracer Image
- Im Tutorial: Anleitung für die Inbetriebnahme des Racers wird beschrieben wo man das Image für den Jetracer herunterladen kann, und wie man es auf einer SD-Karte installiert. Das Installieren auf einer neuen SD-Karte ist relevant, da die mitgelieferte SD-Karte nicht sehr robust ist. Außerdem erklärt dieses Tutorial auch wie man den Jetracer mit dem WLAN verbindet, und dann das später für den Zugriff genutzte Programm NoMachine auf dem Jetracer installiert.
- Virtualbox Ubuntu Image
- Im Tutorial: Anleitung für die Inbetriebnahme des Controllers wird erklärt wo man das Image für den Ubuntu Controller herunterladen kann, und wie man dieses dann im Programm VMware Workstation in Betrieb nimmt. Da dies allerdings nur für einen Monat kostenlos getestet werden kann, sollte besser das kostenlose Oracle VM Virtualbox Programm genutzt werden. Dieses kann hier heruntergeladen werden. Allerdings muss zur Benutzung das Image zu einem anderen File Typen, von .vmx auf .vdi, konvertiert werden. Diese Konvertierung kann in folgenden zwei Schritten durchgeführt werden. Zuerst muss in der Testversion von VMware das .vmx File ausgewählt und dann über das Menü zu einem .ovf File exportiert werden. Danach kann man in Oracle Virtualbox das .ovf File importieren und es wird automatisch zu einem .vdi File konvertiert welches dann benutzt werden kann.
- Verbinden der beiden Parteien
- Im Tutorial: Anleitung für die Verbindung zwischen Racer und Controller ist beschrieben wie man die Verbindung zwischen der Virtual Machine und dem Roboter aufbaut. Wichtig zu beachten ist hierbei das beide Parteien im gleichen WLAN sein müssen. Der PC sollte also per LAN Kabel mit dem Router für das "Autonome Systeme" Netzwerk verbunden sein. Außerdem muss der Roboter per WLAN mit dem Netzwerk verbunden sein. Ebenfalls ist zu beachten das sich die auf beiden Seiten im /etc/hosts File eingetragenen IP Adressen ändern können, jenachdem welche Geräte mit dem Netzwerk noch verbunden sind. Nach dem Hochfahren der beiden Systeme sollten, mit dem ifconfig Befehl, die aktuellen IP Adressen gecheckt, und falls nötig im File geändert, werden.
- NoMachine
- Außerdem wurde für den Zugriff auf den Jetracer, wenn dieser nicht per HDMI an einen Monitor und an eine Tastatur sowie Maus angeschlossen war, das Programm NoMachine benutzt. Dieses Programm kann den Desktop des Roboters über das WLAN spiegeln, und erlaubt so einen kabellosen Zugriff. Hierfür muss lediglich die IP Adresse des Roboters innerhalb des WLANs im Programm angegeben werden, und dann kann eine Verbindung aufgebaut werden.
Inbetriebnahme des Roboters
- Um diesen Schritt durchzuführen muss eine SD-Karte mit einem Jetson Nano Image vorhanden sein, falls dies nicht der Fall ist wird im Abschnitt "[]" erklärt wie das Image auf der SD-Karte installiert werden kann.
- Wifi verbinden
- Connect peripherals such as monitors here, the main purpose is to easily connect to WiFi; if you do not have a monitor, you can refer to step 3.
- Insert the SD card into the Jetson Nano (the SD card slot is on the back of the Jetson Nano module).
- Prepare mouse, keyboard, and monitor, and connect to jetson nano board.
- Turn on the power switch to start the Jetson Nano, and log in after the display lights up normally, where the user name and password: jetson.
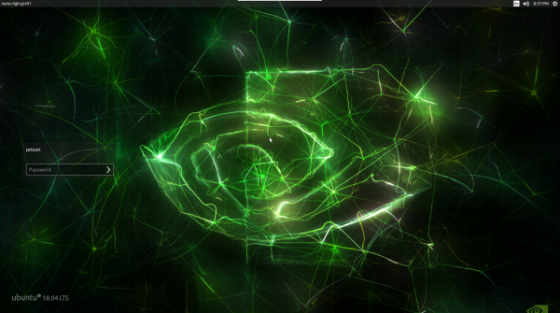
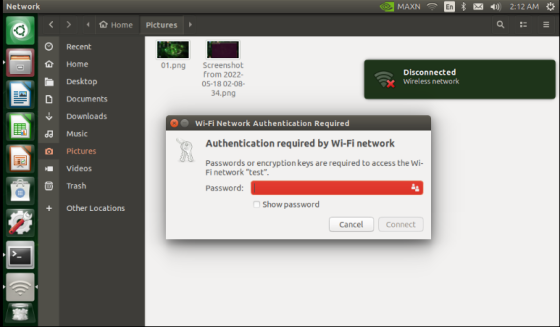
- As login successfully, you can click WiFi to connect. Make sure that jetson nano and PC are connected to the same network, otherwise subsequent communication will fail.
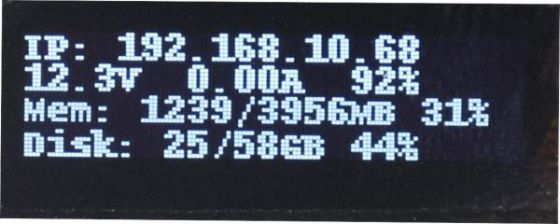
- After connecting to WiFi successfully, the OLED screen of the JetRacer will automatically display the IP address of the WiFi.
- Remote Login
- In the previous steps, we connected the jetson nano and the PC host to the same WiFi, and after restarting the jetson nano will generally remain connected to the original WiFi, and the IP will remain unchanged.
- In the following operations, we all use SSH remote login to start the robot node.
- When the jetson nano is powered on, the OLED screen of the car will display the IP address of the last connected WiFi. At this time, the IP address of the WiFi will be displayed first. If the WiFi is not connected, the IP address of the wired network port will be displayed.
- MobaXTerm
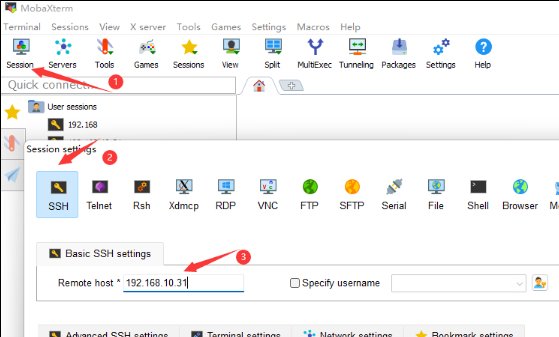
- Download [[1]] software for SSH Remote Login.
- Open MobaXterm, click "Session -> SSH", fill in the IP address displayed by the car in the host, and press Enter to open the terminal; the login name and password are jetson.
- It is easy to transfer the files by MobaXterm.
- To transfer files from Windows to Raspberry Pi simply drag the files to the left directory of MobaXterm.
- Similarly, to transfer Raspberry Pi files to Windows, just drag the files in the left directory of MobaXterm to Windows.
- NoMachine Login
- Compared with SSH and VNC, you may not know much about Nomachine. Nomachine is a free remote desktop software.
- NoMachine basically covers all major major operating systems, including Windows, Mac, Linux, iOS, Android and Raspberry, etc.
- Install On Jetson Nano
- Download and unzip the Nomachine
- After unzipping, you can copy the ".deb file" to the Jetson Nano by the U disk driver or MobaXterm File Transmission.
- Install command:


sudo dpkg -i nomachine_7.10.1_1_arm64.deb
- Install On the Windows Computer
- Download [[2] and open it to install. After clicking Finish, you also need to restart the computer.
- Verbinden zum Jetson Nano
- 1. Open NoMachine and enter the IP address of the Jetson Nano. For example 192.168.15.100
- Please refer to the IP address displayed by the OLED on your car or from the ifconfig command.
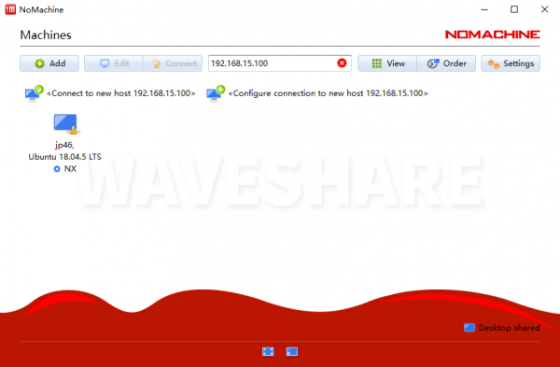
- 2. Click Connect to new host 192.168.15.100, enter the name and password of the Jetson Nano, and then click to log in.
- Use the configured image provided by Waveshare. The name and password are jetson.

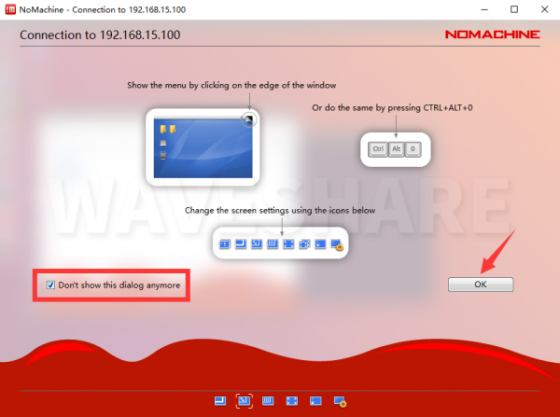
- 3. After downloading, there will display the software introduction, just click "ok".
- 4. Now we can successfully log in to the Jetson Nano.

- IP & Hostname
- Open the robot terminal and enter the following command, check the IP and hostname of the Jetson Nano and remember that it will be used for subsequent multi-machine communication.


ifconfig #Get the IP address of the virtual machine
hostname #Get the hostname of the virtual machine
- Enter the command to check the WiFi name that Jetson Nano is connected to, and make the PC also connect to the same WiFi.

iwconfig wlan0 #View WiFi name

Inbetriebnahme Virtuelle Maschine
- Virtuelle Maschine installieren
- The robot uses the ubuntu virtual machine as the remote control terminal, and it is more convenient and intuitive to control the robot by using various graphical tools of ROS. Here, open the Ubuntu image by VMware. VMware version should be not lower than 16.
- Download [VMware 16]
- Click to download the configured Ubuntu virtual machine image file below; if you want to configure the Ubuntu ROS system by yourself, you can refer to the advanced tutorial. It is recommended to use our configured image for the first time to avoid various problems when configuring the image yourself.
- Download [Ubuntu VM Image]
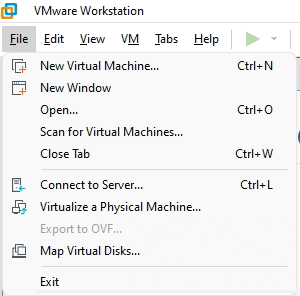
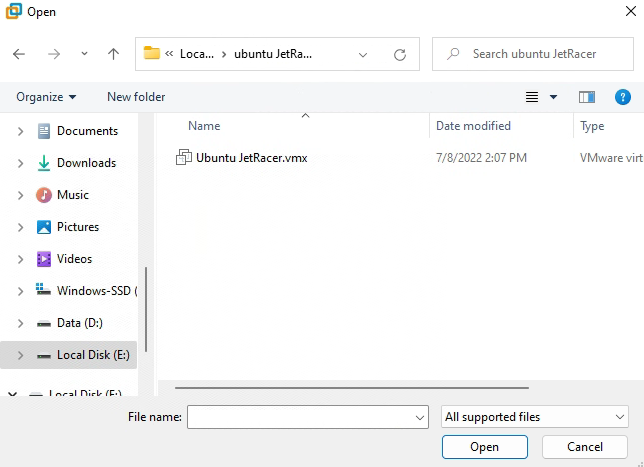
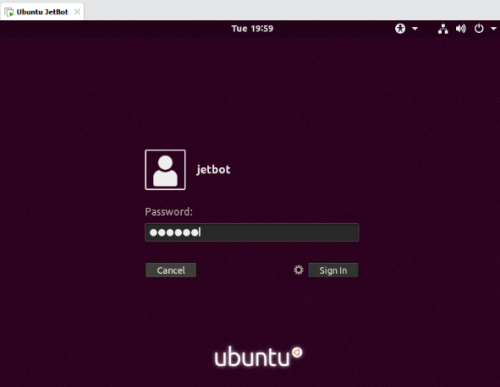
- Install and run the VMware software, click "File -> Open -> Open the downloaded <Ubuntu JetRacer.vmx>", click "Start this virtual machine" and log in, where the username and password are: jetson.
- The robot uses the ubuntu virtual machine as the remote control terminal, and it is more convenient and intuitive to control the robot by using various graphical tools of ROS. Here, open the Ubuntu image by VMware. VMware version should be not lower than 16.
- IP & Hostname
- Open the terminal or press Ctrl+Alt+t, enter the following commands to obtain the IP address and hostname of the virtual machine, and remember, the subsequent multi-machine communication will use 【Note: At this time, we need to ensure that the PC and jetson nano is connected to the same WiFi. The Ubuntu image file and PC we configured are in bridge network mode, under the same WiFi, and the virtual machine and jetson nano is in the same network segment.】


ifconfig # Gibt die IP-Adresse der virtuellen Maschine aus
hostname # Gibt den Hostnamen der virtuellen Maschine aus

Kommunikation Zwischen den Systemen
- Einleitung
- Before configuring multi-machine communication, you need to understand the following three systems:
- PC host: It is generally our commonly used computer, and the system is generally Windows system, which is mainly used to remotely log in to jetson nano via SSH to start the robot control node.
- Ubuntu virtual machine: The Ubuntu system virtual machine installed by VMware software on our PC host mainly realizes ROS graphical display and remote control of the robot, which is more intuitive and convenient.
- jetson nano robot: This is our JetRacer. It adopts jetson nano as the main control and is also an ubuntu system. It is mainly used to realize various nodes such as robot cameras, lidar, and chassis control.
- jetson nano robot installs the ROS robot system and sets it as the host. The Ubuntu virtual machine is also installed in the ROS robot system and set as a slave machine.
- We need to ensure that the above three systems are connected to the same LAN, and the IP addresses are on the same network segment, otherwise normal communication cannot be performed.
- In the following tutorials, the default virtual machine refers to the Ubuntu virtual machine, and the robot refers to the jetson nano robot.
- Variablen setzen
- In the previous tutorial, we supported the IP address and hostname of the robot and virtual machine. If you are not sure, you can run the following command to check.
ifconfig       #Get the IP address of the virtual machine
hostname       #Get the hostname of the virtual machine
- Using our image, the robot hostname is nano-4gb-jp451, and the virtual machine hostname is ubuntu.
- We need to add environment variables to the robot and the virtual machine respectively and set the robot as the host. The virtual machine is set as a slave.
- The environment variables have been added using the image we have configured and do not need to be added again; this step is what you need to add when you configure the image yourself.
- ROS_MASTER_URI changes to point to the ROS host, running the roscore master node independently.
- ROS_HOSTNAME variable is the current ROS hostname.
- 【The editor can be nano or vim, just choose one of them according to your preference.】
sudo apt install nano #install nano editor
- Roboter
- On the robot side, add the following text at the end of the ~/.bashrc file, and replace nano-4gb-jp451 if the actual hostname is another name.
sudo nano ~/.bashrc
Add at the end:
export ROS_MASTER_URI=http://nano-4gb-jp451:11311 #Set the robot as the host
export ROS_HOSTNAME=nano-4gb-jp451
After the addition is complete, run the following command to take effect:
source ~/.bashrc
- Virtuelle Maschine
- On the virtual machine side, add the following text at the end of the ~/.bashrc file, ROS_MASTER_URI is set to point to the robot as the host, and ROS_HOSTNAME is set to the virtual machine hostname.
sudo nano ~/.bashrc
Add at the end:
export ROS_MASTER_URI=http://nano-4gb-jp451:11311     #Point to the robot host
export ROS_HOSTNAME=ubuntu
After the addition is complete, run the following command to take effect:
source ~/.bashrc
- Hostdatei bearbeiten
- Under normal circumstances, after adding environment variables, ROS should be able to communicate normally online. If there are multiple devices with the same name in the LAN, there may be problems such as failure to connect normally or to view topics but not receive topic information. At this point, you need to add hosts to specify the address.
- We need to add honst file settings to the robot and the virtual machine respectively. Please fill in the following settings according to your actual IP address and hostname.
- Roboter
- Open the terminal on the robot and enter the following command, add the IP address and hostname of the Ubuntu virtual machine to the /etc/hosts file of jetson nano, the password is jetson.
sudo nano /etc/hosts
- As shown in the figure below, modify the line below 127.0.1.1 nano-4gb-jp451.localdimain nano-4gb-jp451 to the IP address and hostname of the Ubuntu virtual machine 【if this line is commented out, you need to uncomment.】
- After changing, press Ctrl + x, exit by y, enter, and save it to exit.
- Virtuelle Maschine
- Open the terminal on the virtual machine and enter the following command to open the /etc/hosts file and add the robot IP address.

sudo nano /etc/hosts
- As shown in the figure below, change the line below 127.0.1.1 ubuntu to the IP and hostname of jetson nano. If this line is commented out, it needs to be uncommented.
- After modification, press Ctrl+x, exit y, press Enter, save changes, and exit.
- Kommunikation überprüfen
- Connect the robot to open the terminal by SSH, and enter the following command to start the robot master node.

roscore #Start the robot master node
- []
【The following roslaunch command will also automatically start the master node, but the purpose of starting the master node alone here is to keep connected to the virtual machine all the time, otherwise the master node will be automatically closed when the chassis node is closed, resulting in the virtual machine being disconnected.】
- Open the Ubuntu virtual machine terminal, and enter the following command in the terminal.
rostopic list
- The following normally shows that the two nodes are likely to be able to communicate normally online.
- []
- The robot side saves the startup state of the master node and does not close it. Open a new terminal to run the example receiving node.
rosrun rospy_tutorials listener
- Run the following command on the virtual machine side to start the example sending node.
rosrun rospy_tutorials talker
- []
- After the virtual machine sends the program. The robot side will receive the sent data.
- []
- So far, multi-machine communication is normal. You can also exchange commands between the robot and the virtual machine to test sending the topic from the robot to the virtual machine.