Rapid Prototyping Labor (EN): Unterschied zwischen den Versionen
| (17 dazwischenliegende Versionen desselben Benutzers werden nicht angezeigt) | |||
| Zeile 7: | Zeile 7: | ||
== Laboratory Supervisors == | == Laboratory Supervisors == | ||
<br> | |||
'''Lead Professor:''' [[Benutzer:David Grieshammer|Prof. David Grieshammer]] | '''Lead Professor:''' [[Benutzer:David Grieshammer|Prof. David Grieshammer]] | ||
| Zeile 27: | Zeile 27: | ||
</gallery> | </gallery> | ||
== | == Opening Hours== | ||
<br> | <br> | ||
'''Monday:''' 10:00 AM to 4:00 PM | '''Monday:''' 10:00 AM to 4:00 PM | ||
| Zeile 61: | Zeile 61: | ||
<br> | <br> | ||
== | == Equipment, Materials, and Tools == | ||
<br> | <br> | ||
The Rapid Prototyping Lab provides a certain amount of equipment, materials, and tools for research purposes. If students wish to carry out projects that require additional resources, the necessary extra materials must be supplied by the students or instructors themselves. | |||
== FDM-3D-Print (Fused Deposition Modeling) == | |||
<br> | |||
Fused Deposition Modeling (FDM) is one of the most common technologies in the field of 3D printing. This method enables the layer-by-layer fabrication of three-dimensional objects by extruding thermoplastic material. An FDM printer is particularly well-suited for digital models created using computer-aided design (CAD) software. A model is sliced into individual layers, which are then sent to the 3D printer as instructions. | |||
During the printing process, the printer heats the selected thermoplastic filament until it melts and is extruded through a nozzle. The nozzle moves precisely over the print bed, depositing each layer of the melted material according to the instructions from the digital model. Once a layer is completed, the material solidifies and bonds with the previous layer. | |||
FDM printers offer an efficient and cost-effective method for prototyping. | |||
<br> | <br> | ||
<br> | <br> | ||
[[Datei:PrusaMK4Vase.jpg|left|thumb|400px|PrusaMK4]] | [[Datei:PrusaMK4Vase.jpg|left|thumb|400px|PrusaMK4]] | ||
Build Volume: 250 x 210 x 220 mm (9.84 x 8.3 x 8.6 in) | |||
Filament Diameter: 1,75 mm | |||
Maximum Nozzle Temperature: 290 °C (554 °F) | |||
Maximum Heatbed Temperature: 120 °C (248 °F) | |||
<br> | <br> | ||
| Zeile 81: | Zeile 86: | ||
<br> | <br> | ||
[[Datei:Anycubic Kobra 2 Pro.jpg|left|thumb|400px|Anycubic Kobra 2 Pro]] | [[Datei:Anycubic Kobra 2 Pro.jpg|left|thumb|400px|Anycubic Kobra 2 Pro]] | ||
Build Volume: 250 x 220 x 220 mm (9.8 x 8.7 x 8.7 in) | |||
Filament Diameter: 1,75 mm | |||
Maximum Nozzle Temperature: 260 °C (500 °F) | |||
Maximum Heatedbed Temperature: 110 °C (230 °F) | |||
<br> | <br> | ||
<div style="clear: both;"></div> | <div style="clear: both;"></div> | ||
<br> | <br> | ||
[[Datei:Anycubic Kobra 2 MAX.jpg|left|thumb|400px|Anycubic Kobra 2 MAX]] | [[Datei:Anycubic Kobra 2 MAX.jpg|left|thumb|400px|Anycubic Kobra 2 MAX]] | ||
Build Volume: 500 x 420 x 420 mm (19.6 x 16.5 x 16.5 in) | |||
Filament Diameter: 1,75 mm bei einer 0.4 Nozzle | |||
Maximum Nozzle Temperature: 260 °C (500 °F) | |||
Maximum Heatedbed Temperature: 90 °C (194 °F) | |||
<br> | <br> | ||
<div style="clear: both;"></div> | <div style="clear: both;"></div> | ||
== MSLA-3D- | == MSLA-3D-Print(Masked Stereolithography) == | ||
MSLA (Masked Stereolithography) | MSLA (Masked Stereolithography) is an additive manufacturing process that belongs to the family of resin-based 3D printing technologies. Unlike traditional stereolithography (SLA), which cures resin point by point using a laser, MSLA uses a UV light source in combination with an LCD screen as a mask. This display selectively blocks or allows UV light to pass through at the pixel level, curing entire layers of photosensitive resin simultaneously. | ||
The process enables high print resolution and fine details but is limited to light-sensitive materials (photopolymers). MSLA printers are especially popular in model making, jewelry design, miniatures, and the dental field. | |||
<br> | <br> | ||
| Zeile 114: | Zeile 116: | ||
'''Unterstützte Materialien:''' UV-empfindliches Flüssigharz (405nm), lang belichtete Materialien werden unterstützt | '''Unterstützte Materialien:''' UV-empfindliches Flüssigharz (405nm), lang belichtete Materialien werden unterstützt | ||
<br> | <br> | ||
The Prusa SL1S is a 3D printer based on MSLA technology. It uses a high-resolution monochrome LCD panel combined with a powerful UV LED array to precisely cure thin layers of resin. The MSLA technology of the SL1S enables significantly higher detail accuracy compared to conventional FDM printers. This makes it ideal for applications requiring precise results and smooth surfaces. | |||
<br> | <br> | ||
| Zeile 125: | Zeile 127: | ||
[[Datei:Prusa CW1s.jpg|left|thumb|400px|Prusa CW1S Curing and Washing Machine]] | [[Datei:Prusa CW1s.jpg|left|thumb|400px|Prusa CW1S Curing and Washing Machine]] | ||
The CW1S supports multiple steps in the 3D printing process. Before printing, the device preheats the resin. Afterwards, it takes care of washing, drying, and curing the finished models. This way, the CW1S combines all essential post-processing functions in one compact system. | |||
| Zeile 131: | Zeile 142: | ||
<div style="clear: both;"></div> | <div style="clear: both;"></div> | ||
===== | ===== Preheating the resin ===== | ||
Resins change their consistency during storage. Therefore, they should be shaken well before use. The CW1S can additionally preheat the resin, bringing it to the ideal temperature for printing and ensuring better results with the SL1S. | |||
<br> <br> | <br> <br> | ||
[Bild: Placeholder] | [Bild: Placeholder] | ||
<br> <br> | <br> <br> | ||
===== | ===== Washing ===== | ||
After printing, the uncured resin must be removed from the model's surface. The CW1S uses a stainless steel tank filled with isopropyl alcohol and a magnetic propeller for this purpose. The movement of the propeller ensures that the liquid reaches every part of the model. This method is gentler than ultrasonic cleaning and is also suitable for very small objects. | |||
<br> <br> | <br> <br> | ||
[Bild: Placeholder] | [Bild: Placeholder] | ||
<br> <br> | <br> <br> | ||
===== | ===== Drying===== | ||
To avoid resin stains on a model, it should be dried beforehand. | |||
<br> <br> | <br> <br> | ||
[Bild: Placeholder] | [Bild: Placeholder] | ||
<br> <br> | <br> <br> | ||
===== | ===== Curing ===== | ||
Curing with UV light is an important step in the resin printing process. Printed objects are initially soft. The UV treatment improves their strength and surface properties. | |||
<br> <br> | <br> <br> | ||
[Bild: Placeholder] | [Bild: Placeholder] | ||
| Zeile 159: | Zeile 173: | ||
== Laser Cutting == | == Laser Cutting == | ||
<br> | <br> | ||
The FabCore is a CO₂ laser cutter designed for use in educational institutions, workshops, and small businesses. It is offered as a desktop device and is suitable for cutting and engraving non-metallic materials such as wood, acrylic, leather, or paper. The machine features a fully enclosed design with safety features including a door lock, emergency stop button, and key switch. | |||
Control is managed via LightBurn software, which supports various vector and image file formats. The laser focusing is manual. An integrated air assist helps achieve clean cuts. The machine’s structure is based on an anodized aluminum frame with linear rails for the XY axes. | |||
<br> | <br> | ||
[[Datei:FabCore 40W Laser Cutter.jpg|left|thumb|600px|FabCore Laser Cutter]] | [[Datei:FabCore 40W Laser Cutter.jpg|left|thumb|600px|FabCore Laser Cutter]] | ||
''' | '''Laser Power:''': 40 W CO₂ Laser Tube | ||
''' | '''Working Area:''' 600 × 300 mm | ||
''' | '''Maximum Material Thickness:''' Up to 12 mm poplar plywood or 10 mm acrylic (depending on the material) | ||
''' | '''Supported Formats:''' SVG, DXF, AI, PDF, BMP, PNG, JPG, HPGL, PLT | ||
''' | '''Focus:''' Manual focus adjustment using the supplied tool | ||
''' | '''Connectivity:''' USB connection to the computer or file transfer via USB stick | ||
'''Software:''' | '''Software:''' Compatible with LightBurn | ||
<br> | <br> | ||
<div style="clear: both;"></div> | <div style="clear: both;"></div> | ||
Aktuelle Version vom 27. Mai 2025, 09:29 Uhr

Laboratory Supervisors
Lead Professor: Prof. David Grieshammer
Research Associate: Olaf Erler
Tutors/Student Assistants: Herr Cristian Nicosia, Herr Max Wolf, Herr Bilial Kocabiyik
Contact: cvd-rp-lab@hshl.de
Room: L3.3-E01-140, Campus Lippstadt
-
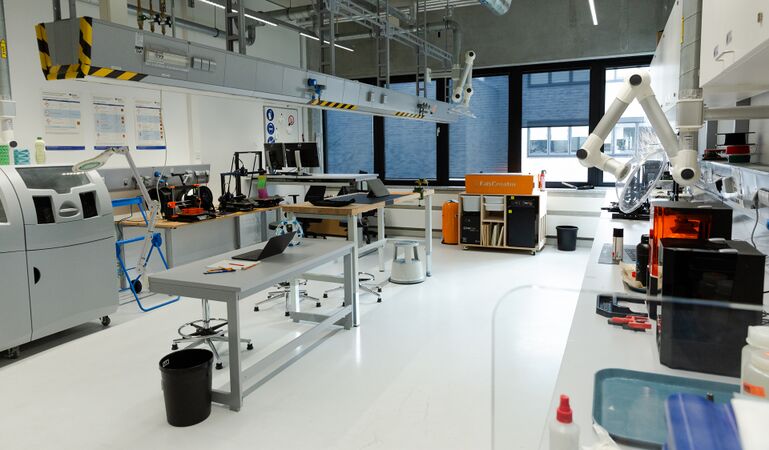 Rapid Prototyping Labor
 -
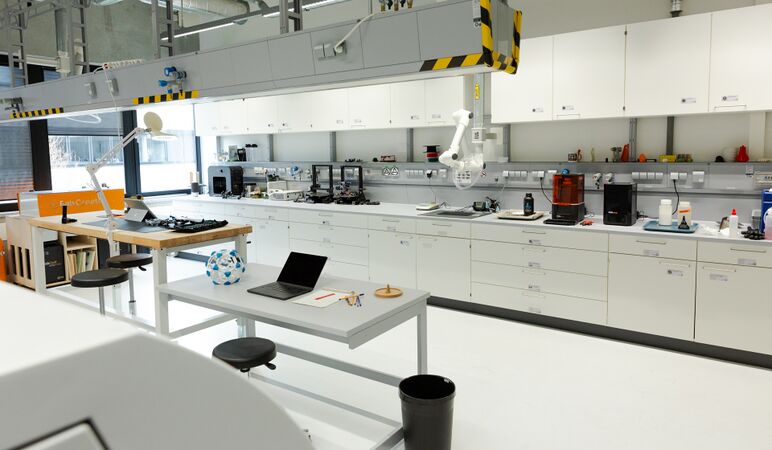 Rapid Prototyping Labor


Opening Hours
Monday: 10:00 AM to 4:00 PM
Tuesday: 10:00 AM to 2:00 PM
Wednesday: 10:00 AM to 4:00 PM
Thursday:10:00 AM to 12:00 PM
Friday: geschlossen
If no one is present, we can be reached by e-mail or telephone. Appointments are possible.
Print Requests
You can submit a print job at any time at the Rapid Prototyping Lab. Feel free to visit us directly in the lab. Alternatively, you can also submit a print request via email.
Please send your model to the following email address: cvd-rp-lab@hshl.de
Important Notes for a Smooth Process:
- Submit your model as an STL file.
- Make sure to consider the maximum build volume of our 3D printers.
- Specify your preferred printing method (FDM printing or SLS printing).
- Allow sufficient time for printing, especially if it is needed for a submission deadline.
- Please note that the Rapid Prototyping Team does not correct any errors in your model. However, we are happy to answer any questions you may have about it.
- For more in-depth consultation, you can schedule an appointment with us in advance.
Equipment, Materials, and Tools
The Rapid Prototyping Lab provides a certain amount of equipment, materials, and tools for research purposes. If students wish to carry out projects that require additional resources, the necessary extra materials must be supplied by the students or instructors themselves.
FDM-3D-Print (Fused Deposition Modeling)
Fused Deposition Modeling (FDM) is one of the most common technologies in the field of 3D printing. This method enables the layer-by-layer fabrication of three-dimensional objects by extruding thermoplastic material. An FDM printer is particularly well-suited for digital models created using computer-aided design (CAD) software. A model is sliced into individual layers, which are then sent to the 3D printer as instructions.
During the printing process, the printer heats the selected thermoplastic filament until it melts and is extruded through a nozzle. The nozzle moves precisely over the print bed, depositing each layer of the melted material according to the instructions from the digital model. Once a layer is completed, the material solidifies and bonds with the previous layer.
FDM printers offer an efficient and cost-effective method for prototyping.

Build Volume: 250 x 210 x 220 mm (9.84 x 8.3 x 8.6 in)
Filament Diameter: 1,75 mm
Maximum Nozzle Temperature: 290 °C (554 °F)
Maximum Heatbed Temperature: 120 °C (248 °F)

Build Volume: 250 x 220 x 220 mm (9.8 x 8.7 x 8.7 in)
Filament Diameter: 1,75 mm
Maximum Nozzle Temperature: 260 °C (500 °F)
Maximum Heatedbed Temperature: 110 °C (230 °F)

Build Volume: 500 x 420 x 420 mm (19.6 x 16.5 x 16.5 in)
Filament Diameter: 1,75 mm bei einer 0.4 Nozzle
Maximum Nozzle Temperature: 260 °C (500 °F)
Maximum Heatedbed Temperature: 90 °C (194 °F)
MSLA-3D-Print(Masked Stereolithography)
MSLA (Masked Stereolithography) is an additive manufacturing process that belongs to the family of resin-based 3D printing technologies. Unlike traditional stereolithography (SLA), which cures resin point by point using a laser, MSLA uses a UV light source in combination with an LCD screen as a mask. This display selectively blocks or allows UV light to pass through at the pixel level, curing entire layers of photosensitive resin simultaneously.
The process enables high print resolution and fine details but is limited to light-sensitive materials (photopolymers). MSLA printers are especially popular in model making, jewelry design, miniatures, and the dental field.

Druckvolumen: 127×80×150 mm
LCD-Auflösung: 5,96, 2560×1620p
Schichtbelichtungszeit: 1,3 - 2,4 Sekunden je nach Material und Schichthöhe
Kippzeit 3 Sekunden
Unterstützte Schichthöhen: 0,025-0,1 mm
Minimale Schichthöhe: 0,01 mm
Unterstützte Materialien: UV-empfindliches Flüssigharz (405nm), lang belichtete Materialien werden unterstützt
The Prusa SL1S is a 3D printer based on MSLA technology. It uses a high-resolution monochrome LCD panel combined with a powerful UV LED array to precisely cure thin layers of resin. The MSLA technology of the SL1S enables significantly higher detail accuracy compared to conventional FDM printers. This makes it ideal for applications requiring precise results and smooth surfaces.

The CW1S supports multiple steps in the 3D printing process. Before printing, the device preheats the resin. Afterwards, it takes care of washing, drying, and curing the finished models. This way, the CW1S combines all essential post-processing functions in one compact system.
Preheating the resin
Resins change their consistency during storage. Therefore, they should be shaken well before use. The CW1S can additionally preheat the resin, bringing it to the ideal temperature for printing and ensuring better results with the SL1S.
[Bild: Placeholder]
Washing
After printing, the uncured resin must be removed from the model's surface. The CW1S uses a stainless steel tank filled with isopropyl alcohol and a magnetic propeller for this purpose. The movement of the propeller ensures that the liquid reaches every part of the model. This method is gentler than ultrasonic cleaning and is also suitable for very small objects.
[Bild: Placeholder]
Drying
To avoid resin stains on a model, it should be dried beforehand.
[Bild: Placeholder]
Curing
Curing with UV light is an important step in the resin printing process. Printed objects are initially soft. The UV treatment improves their strength and surface properties.
[Bild: Placeholder]
Laser Cutting
The FabCore is a CO₂ laser cutter designed for use in educational institutions, workshops, and small businesses. It is offered as a desktop device and is suitable for cutting and engraving non-metallic materials such as wood, acrylic, leather, or paper. The machine features a fully enclosed design with safety features including a door lock, emergency stop button, and key switch.
Control is managed via LightBurn software, which supports various vector and image file formats. The laser focusing is manual. An integrated air assist helps achieve clean cuts. The machine’s structure is based on an anodized aluminum frame with linear rails for the XY axes.

Laser Power:: 40 W CO₂ Laser Tube
Working Area: 600 × 300 mm
Maximum Material Thickness: Up to 12 mm poplar plywood or 10 mm acrylic (depending on the material)
Supported Formats: SVG, DXF, AI, PDF, BMP, PNG, JPG, HPGL, PLT
Focus: Manual focus adjustment using the supplied tool
Connectivity: USB connection to the computer or file transfer via USB stick
Software: Compatible with LightBurn